
I got an email last week requesting I bid on 3 signs. The sign designs were gorgeous pub signs and begged to be dimensional. But, it turned out the budget was not sufficient for us to do the project in our shop. The fellow was nice and was in a jam. He asked if I could whip up the 3D files for him as he was brand new to EnRoute. It turned out he was seriously looking at a new MultiCam router and his dealer had offered to run the signs for him if no one else could as a test. I looked at the file and decided I could build it for him. The files were definitely complex, but he promised the complete vectors and That would save me a lot of work - or so I thought. How long would it take anyway? Silly me.
When I tried to open the vectors the center of my screen was literally black with lines. It took me a couple of tries to figure it out... EnRoute was importing the gradients as an endless series of closely spaced vector lines, making the file far too complex. The solution was to open the files in Illustrator and then get rid of all fills and blends. The files then imported flawlessly into EnRoute. But many of the vectors in the file were far from usable. The letters were far too thin, outlines were missing and many things were broken up into small bits, and had to be combined. I also had to carefully plan out each sign to determine how I would shape and layer it to become a 3D piece. While the illustrations looked fabulous, on closer inspection they simply wouldn't work as drawn in the 3D world. Instead of just opening the 3 files I spent about an hour on each one - before I started creating reliefs. Now I was ready to start... at last.


The signs were to be 2 sided and so I started with a half inch thick relief. They would be routed from 2" thick HDU.

Then I added a .2" double border. This was done by adding to the relief.

From here on in things got more complex. Each layer was created as a separate relief, floated into final position as necessary and then merged to the base relief. The outline of the inside fancy border was next as a raised panel, above the border lines.

Then the scroll was formed. Each level of the scroll folds was created as a separate relief at the appropriate level, combined together and lastly merged with the base relief. I did plenty of checking and saved often as there were not enough undos in my computer.
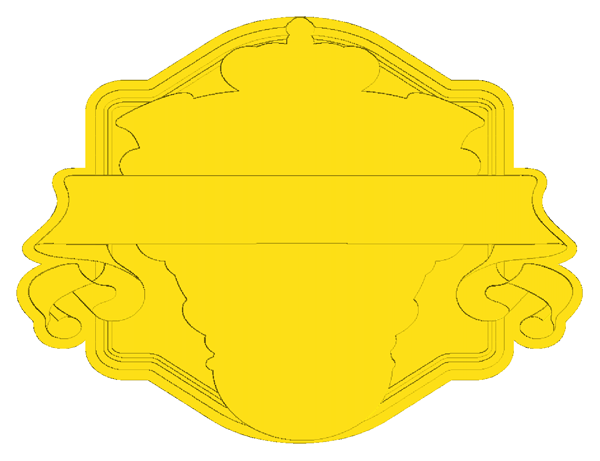
The top scroll and the fancy filigree was next, done layer by layer and then merged with the bottom layer.

For the crown at the top of the sign I decided I wanted a little more dimension. I formed a flat relief and then modified it with an oval. This rounded the crown out dramatically. I went to the side view to bring it up above the top banner. As I built the file I deleted the vectors and redundant reliefs after they had been merged. The confusing myriad of lines hurt my head and I wanted them gone as soon as I was happy with the result. Then I could move on.


The queens outline and then the lettering itself was next. The prismatic letters looked really cool. I figured since this sign was so fancy one more element wouldn't hurt.

The home town letter and it's border was the next item on the agenda. They were floated up above everything else and then merged with the base relief.

The bar oval was as much work as the rest of the sign all by itself. The woven ribbon vectors had to be recreated from scratch so it was usable as a routing file - a lot of work but well worth the effort. This is a trick I'll file away for future use! Then the other elements were built as separate reliefs and combined for the bar button.

I floated this to the same overall height as the tallest lettering and merged it to the base relief. Just like that the file was ready for tool pathing. I was delighted with the results! One sign down - two more to go!

Since I had blazed a difficult trail on the first file it was easier to follow on the next two signs. They went a little faster and I was delighted with the results.


The finished designs are gorgeous however. I may just fire up the MultiCam and throw a piece of Precision Board on the router to give the file a test spin. I could always use another sample on the wall. :)
I'll try my best to remember to remind myself that the next time I volunteer for a 'little' project that I perhaps should take a little closer look at it to see what is involved. But then again I've been trying to remember that lesson for years with little success. :)
-dan