
Last night I designed the display piece for our friends at Coastal Enterprises' booth at the International Sign Association EXPO in Orlando in March. I just knew that as soon as we got going again after the New Year we'll be busy until our big projects are finished in May. I enjoy getting my hands dirty in the shop and without crew and other interruptions I can get a lot done in a hurry.
As always space in a trade show booth is in short supply. I decided a small 24" x 24" table to display samples of their products would be just the ticket. Coastal Enterprises makes Precision Board, glues and primers which we use in our shop exclusively.
The project is made of three pieces... a base pedestal with their logo routed into each side, the strongman robot, and the tabletop.

I designed the routing files in Enroute. The sides had the Coastal enterprises logo routed into them. I'll be hand texturing the faces and top and adding rivets. For the feet of the robot I drew the vectors of the few on top of the base top to get the scale right and to make sure it didn't overlap our company ID.

Then I used the dome tool to round the tops.

I then went to the front view as I knew they were a little shallow. It was a simple matter of grabbing the center top node and pulling it vertical until I had the profile I needed.

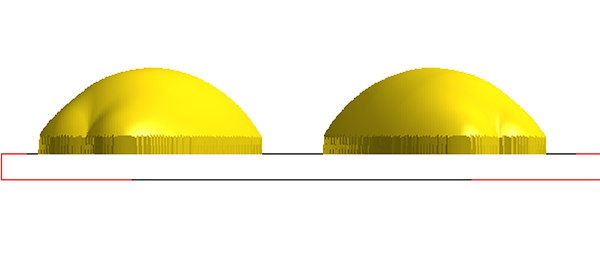
I then created a couple of zero height reliefs which were merged lowest with the feet reliefs to drill holes in the center. This allowed the few to slip over the structural steel which protruded from the base plate. This steel structure provides the armature for the robot sculpture.

I tool pathed the files and sent them off to the MultiCam router. The sides and top of the box were routed from 1" thick 30 lb Precision Board.

The sides of the base were screwed to a plywood box which I had previously built.. It was fastened to a 1/4" stem plate which I cut on the MultiCam CNC plasma cutter, The few were done as two pieces which stacked on top of each other to give me the 1.5" depth I wanted. These were fastened to the base top. I then hand sculpted the detail over these forms using Sculpting Epoxy.
Since we were going out to see the Star Wars movie this is as far as I got today. Tomorrow I'll do a little more on the project. Stay tuned...
